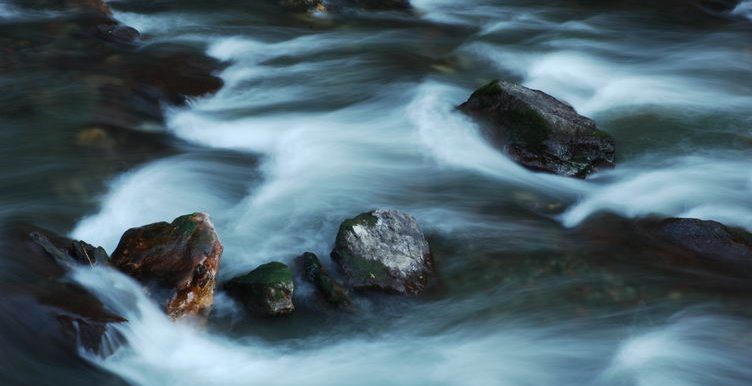
Technology changes with time, but the fundamentals and recipes in photography remains. This article was first published in 2006, revised in 2018 and 2020
“If there is magic on this planet, it is contained in water.” (Loran Eisely, The Immense Journey, 1957)
No doubt about it, some of the most stunning images ever captured has some elements of water in it. Everyday, we get in touch with water. It can be the flow of your bath tub tap, or the fountain that is in front of your office building. If we go for our travel holiday, we will also chance upon the gentle streams, cascading waterfalls, beautiful fountains or even the strong gushes of waves hitting the shoreline.
Somehow, most of us would probably ask some of our family members to pose a shot with the water feature. We often overlook the fact that with a magical touch of your play of exposure, you can turn the scene into a magical world of fantasy, with that blur motion of the flowing water.
It may sound daunting for some to believe that they are able to capture such splendid images which the professional photographers capture with ease. With a little bit of effort and experimentation with the following tips, you are on your way to getting that very first professional looking shot of water in motion.
Water can be static or moving. If water is in a state of motion, for example flowing from a waterfall or a moving stream, you can decide whether to freeze or motion blur the water.
The secret behind getting the water freeze or blurred in motion lies in the shutter speed.
We can freeze the water with a fast shutter speed of at least 1/125 or blur its motion with a shutter speed of less than 1 second. Usually, we would like to capture the motion blur of the water.
As you look through your viewfinder (for DSLR users) or your LCD screen (for Mirrorless camera users), you may find something appearing:
- 125 f3.5 – it means that you have a shutter speed of 1/125 with aperture f3.5
- 15” f22 – it means that you have a shutter speed of 15 seconds with aperture f22
The clue here is f22 is a smaller aperture than f3.5, which means that with f22, you will have a slower shutter speed as compared to f3.5. Smaller aperture allows less light to enter the lens, hence you will need more exposure time in the form of a slower shutter speed.
To clarify, 1/125 is a faster shutter speed compared to 15 seconds. For the DSLR users, you can set aperture size easily to f22 with the Aperture Priority Mode. For the compact digital cameras, your limitation lies in the fact that your smallest aperture is likely to be f8 or f11. The smaller the aperture, the slower the shutter speed. If you can understand this fundamental, you are on your way to getting the image done.
To capture that motion blur of the water, your target shutter speed is 1 seconds or slower. We shall discuss on how to get it done:
- Setting your camera to Aperture Priority Mode, adjust your aperture to a small one until the camera meter reads 1 second for shutter speed. Sometimes, the lighting might be a bit too strong and it is impossible to achieve 1 second. You can overcome this problem by setting your ISO to the lowest, putting a piece of Neutral Density filter or Polarisor filter onto your lens, which will help allow less light to enter the lens, hence resulting in much slower shutter speed.
- Setting your camera to Shutter Priority Mode, adjust your shutter speed to 1 second. Just a warning, if you use this method, you have to ensure that the aperture does not blink or show Hi, which means over exposure. If you have over exposure, you may like to set your ISO to the lowest and put on the Neutral Density filter or Polarisor filter.
- Setting your camera to Manual Mode, adjust the aperture and shutter speed on your own with the aim of reaching 1 second for the shutter speed. Use a lowest ISO, with the Neutral Density filter or the Polarisor filter if need be.
Usually, you may end up using settings like 1” f22 at ISO100 or ISO200 (subject to differing lighting conditions) with the Polarisor filter if you want to shoot the water in motion blur in the day time. For the DSLR users, it is not be a problem for you to set the aperture to f22 with most lenses. For the compact camera users, your limitation of f8 or f11 being the smallest aperture will mean that it is quite hard to achieve the 1 second shutter speed with your compact digital camera. In your case, you may set your aperture to f8 or f11, use a lowest ISO, add the Neutral Density filter or Polarisor filter (with the Cokin filter attachment for compact camera), which may probably give you reading like 8 f11 (subject to differing lighting conditions). This setting may get you some degree of water in motion blur. As the saying goes, “better than not trying”.
At shutter speed slower than 1 second, we will definitely need a tripod as well as a cable release or a remote control. If your camera does not support the use of the cable release or the remote control, you may like to activate the self timer in the camera to trigger the shot. If at all possible, avoid pressing the shutter release button for such slow shutter speed, even if you have a steady tripod. You may like to avoid any form of camera shake if possible.
Another thing to share with you is the degree of motion blur of the water. Regardless with 1 second, 2 seconds, 3 seconds or slower shutter speed, the water will be equally blurred. The cause of concern here is as the shutter speed gets too slow, you may end up with other subjects blurred such as the moving leaves due to the wind etc. Hence, if you purely want the water in motion blur with the rest of the image as sharp as possible, you may like to settle for just the 1 second shutter speed with a decent tripod.
Things to look out for if you want to shoot the water in motion blur:
- Look out for the direction of flow of the water.
- Avoid the angle where the water is lit by the strong sunlight. This will cause a white “burnt” patch in the image.
- Look out for complementing subjects, such as leaves, rocks, anything that is stationary. You will need something stationary to contrast against the moving water.
With the above in mind, you can use this technique and tips in your search for the water feature. Try some of the local places such as the Bird Park, Zoo or Botanic Garden which has some nice water features. These can be good practice targets for your future photography expeditions to waterfall “infested” places like China’s Jiuzhaigou etc.
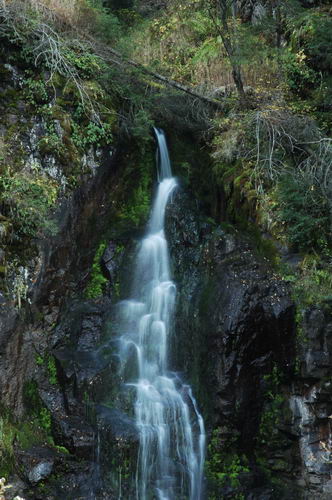
Matrix metering, Daylight White Balance, ISO100, Aperture Priority Mode, Shutter speed 1 second, Aperture f25
When we shoot the flow of a waterfall, it is good that we take into consideration the flow direction of the water. A straight cascading water will not be as interesting as the above, where the water flow gets interrupted by the rock formation, which results in a more interesting flow pattern.
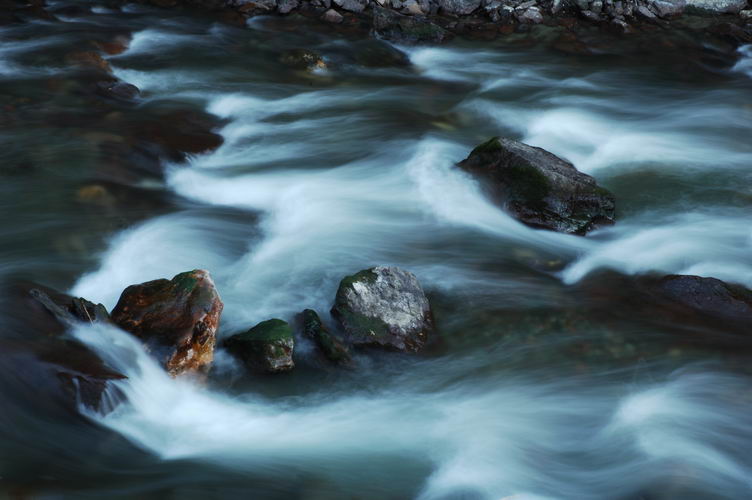
Matrix metering, Daylight White Balance, ISO100, Aperture Priority Mode, Shutter speed 1 second, Aperture f25
In this picture, the flow of the water is interrupted by the rocks which results in the “turbulent” flow effect.
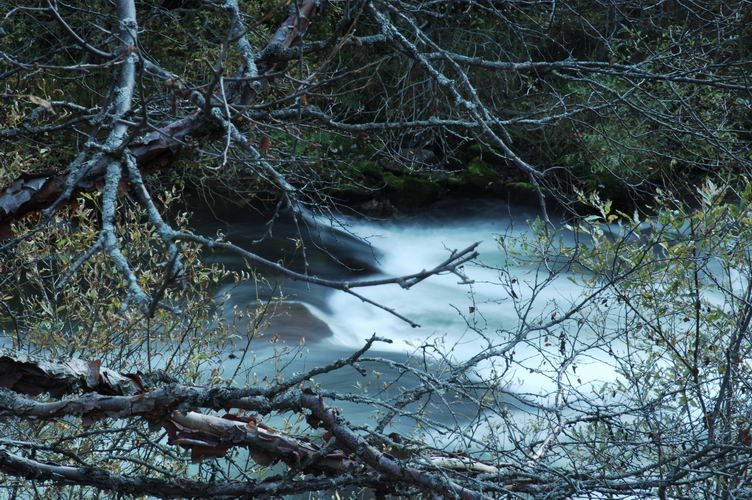
Matrix metering, Daylight White Balance, ISO100, Aperture Priority Mode, Shutter speed 1 second, Aperture f25
I chanced upon a flowing stream during a trip in China. We asked the driver to stop the car and explore possible angles. There are not many rocks or contours in the water. Shooting the water flow alone will be quite boring. In the end, I decided to use the twigs as a frame effect to complement the flow of the water.
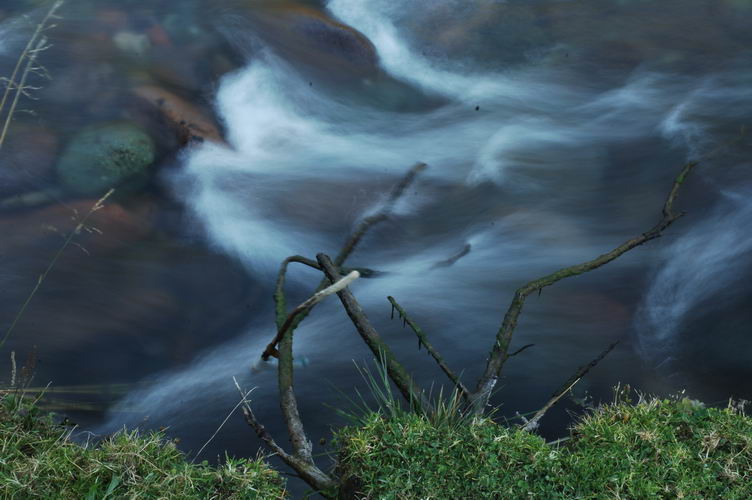
Matrix metering, Daylight White Balance, ISO100, Aperture Priority Mode, Shutter speed 1 second, Aperture f25
These branches held on stubbornly against the flow of the water and not washed away. The branches are swaying with the flow. To capture motion blur of the water but with some degree of sharpness for the branch is technically challenging. Hence, I decided to try the 1 second shutter speed. It works!
PRACTICAL SESSION
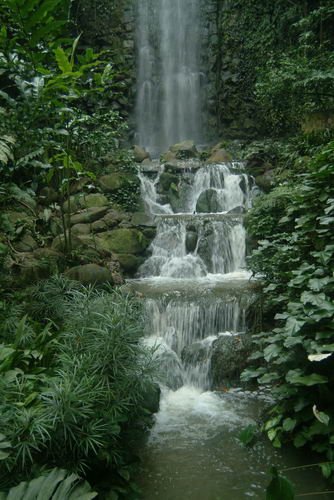 |
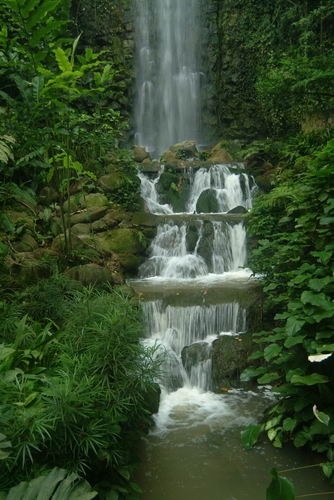 |
| Picture above is taken without the polarisor filter at the Singapore Bird Park. | Picture above is taken with the polarisor filter. Note the elimination of the reflection of the sky on the leaves. A more saturated green is achieved. The filter also helps to slow down the shutter speed. |
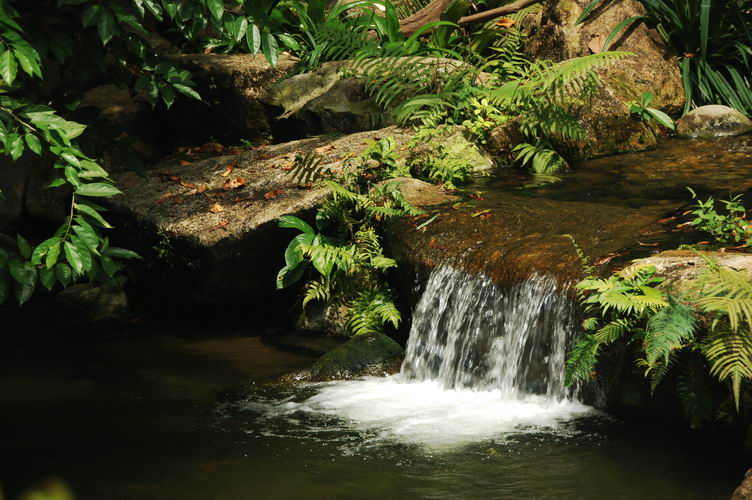 |
 |
| Centre-weighted metering, Daylight White Balance, ISO400, Aperture Priority Mode, Shutter speed 1/80, Aperture f6.3 Taken at the Singapore Zoo. With a faster shutter speed, the motion of the water is “freezed” and looks just like any other ordinary snapshot. |
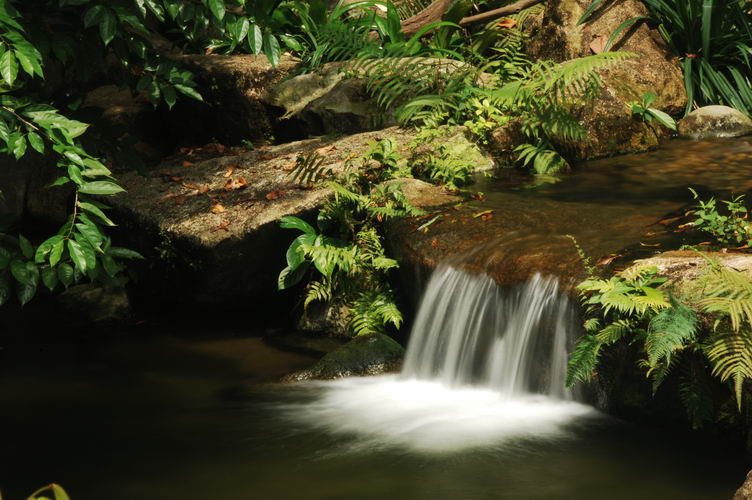
Centre-weighted metering, Daylight White Balance, ISO100, Aperture Priority Mode, Shutter speed 1 second, Aperture f34 With the 1 second shutter speed, the motion of the water is “blurred” and the overall look and feel of the image is changed, for the better. |
