Technology changes with time, but the fundamentals and recipes in photography remains. This article was first published in 2009, revised in 2018
“Perspective can be illusions that can fool your eyes, creating a sense of distance and depth!” – Steven Yee
There are occasions when you see certain images with long lines that lead you away to the corner of the image, thus showing a sense of distance and depth. False illusions? This is the play of perspective.
Perspective is one of the Design Elements in Visual Art. The use of perspective to create a sense of distance and depth is used commonly by many photographers. Used adequately, it is good for shooting architecture, landscape, portrait and daily scenes.
The next thing to talk about is how to get it done.
- In Program (P), Aperture Priority (A), Shutter Speed Priority (S) or Manual mode (M)?
- Fast or slow shutter speed?
- High or low ISO?
- Big or small aperture for the Depth of Field
These might be the questions that linger in your mind as you prepare yourself for the shot. If you really appreciate basic photography well, you will understand that the 4 exposure modes (P,A,S,M) are just 4 different ways to control the 3 variables, being ISO, Aperture and Shutter Speed.
For a start, by asking yourself whether you are shooting with or without a stable tripod will help answer part of your queries. Next, is your subject static or moving? Do you want a shallow or deep depth of field? How is the lighting condition, sunny or low light? Would you prefer your image to have less noise?
For static subjects, any shutter speed will get the job done. You can use a low ISO, set your exposure mode to either P,A,S,M mode, with P being the more convenient option. At A or M mode (where you can set the Aperture), you can consider setting to a slightly smaller aperture like f8 or f11 to get a deeper depth of field for overall clarity. If the shutter speed is slow due to the low ISO and small aperture, you can consider using a tripod. If the tripod is not available, then use a higher ISO. The hint is that it is better to have noise than camera shake. For many beginners, the main problem would probably be camera shake due to shutter speed slower than 1/(focal length) of a second. It is strongly not advisable to use S mode set to a very fast shutter speed beyond the limitation of aperture and ISO range as this will result in under-exposure.
In the event of a non-stationery (moving) subject, you may have to set a higher ISO and use a bigger aperture to get a shutter speed fast enough, ideally at least 1/125s, to freeze the motion.
Some tips:
- The following pages show some common approaches in playing with the perspectives. They could be curved lines, long lines leading to the centre or to a corner. These help you to look at the perspective in different ways.
- Positioning of the angle will create different visual impact for the perspective. Try shooting from the eye level, knee level and very low angle (almost touching the floor)
- Try to shoot with both the portrait and landscape orientation.
- Consider placing a main subject
With the above tips in mind as well as the case studies below, enjoy yourself in exploring perspectives.
Footnote: Exposure Modes
- P mode – Program Mode
- A mode – Aperture Priority Mode
- S mode – Shutter Speed Priority Mode
- M mode – Manual Mode
The approach
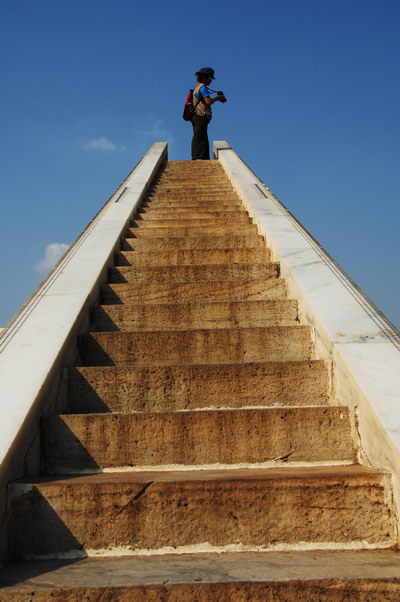
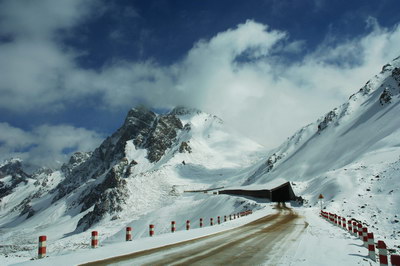
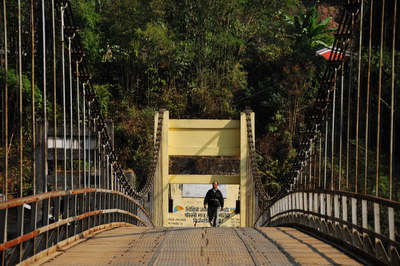
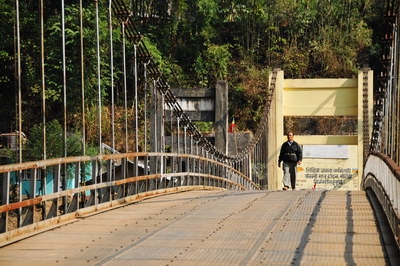
There are a few approaches in playing with the perspectives, as shown by the red arrows in the following images.
Approach 1:
 |
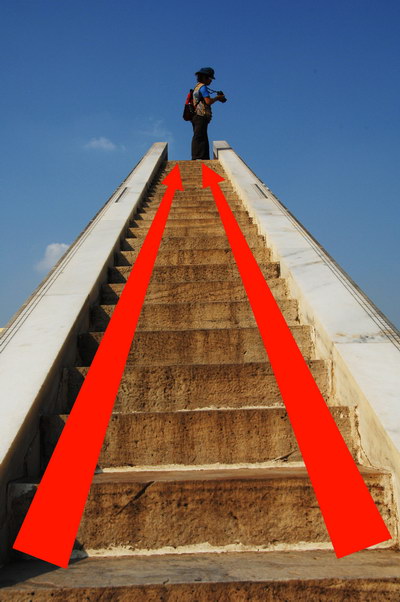 |
| The perspective leads to the subject who is positioned in the Rule of Thirds position. This approach relies on the intricate balance of the symmetry along the centre of the image. | |
Approach 2:
 |
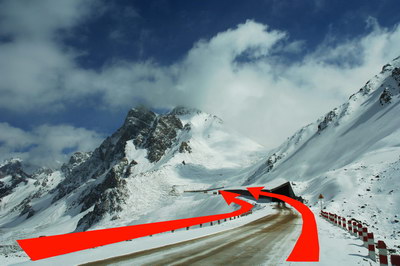 |
| The curvy perspective leads to the vanishing point in this case. | |
Approach 3:
 |
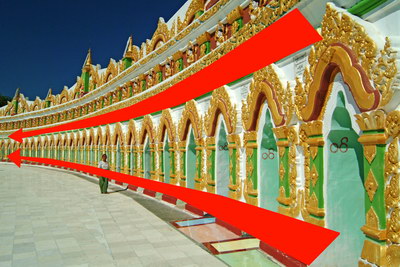 |
| The perspective leads to the side of the image. | |
Approach 4:
 |
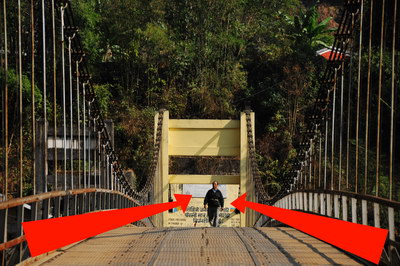 |
| The perspective leads to the subject who is positioned in the Rule of Thirds position. This approach relies on the intricate balance of the symmetry along the centre of the image. | |
Approach 5:
 |
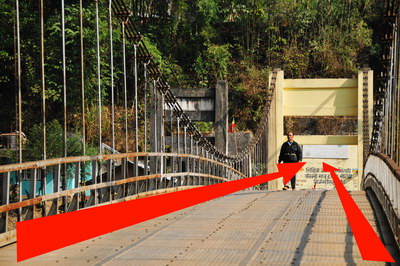 |
| The perspective leads to the subject who is positioned in the Rule of Thirds position. Note the difference between approach 5 and approach 4. | |
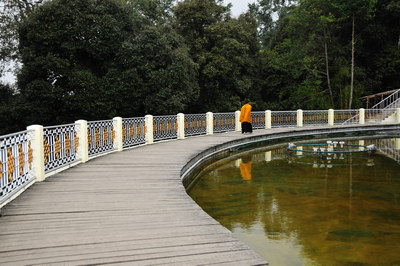
Positioning of the angle – eye level and low angle
 |
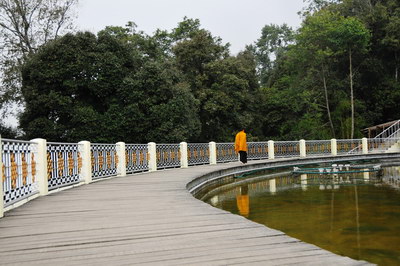 |
| At eye level position | At low angle position (kneel level) |
| Notice the difference between the two images above. At eye level, the curve does not turn as sharply as compared with the image taken at a low angle. The two images provide a different visual experience. You can also try putting the camera close to the floor and observe how the curve turns even sharper. It serves no harm to photograph the scene at the various levels from eye level to knee level and close to the floor. | |
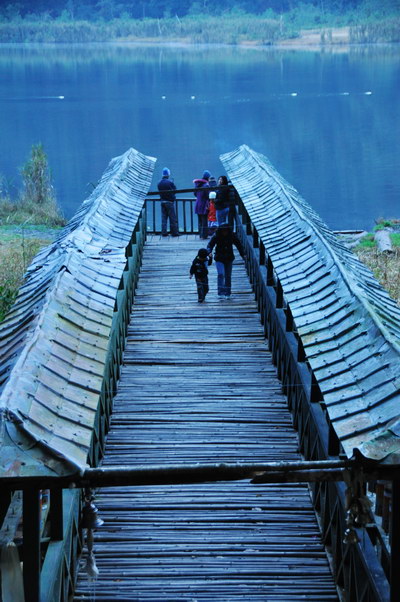
Portrait or Landscape Orientation
 |
 |
 |
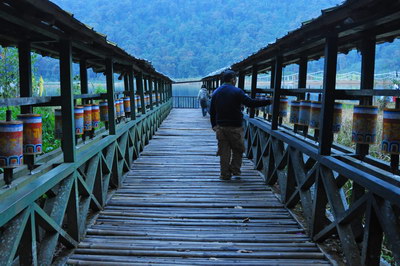 |
| The above examples shows how the perspective of the image differs with either portrait or landscape orientation. Both orientations provide very different visual impact. It is a good habit to photograph a scene using both the portrait and landscape orientation. | |
With and Without a Subject
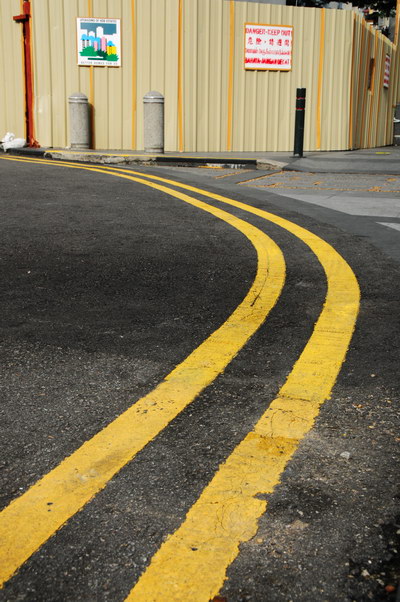 |
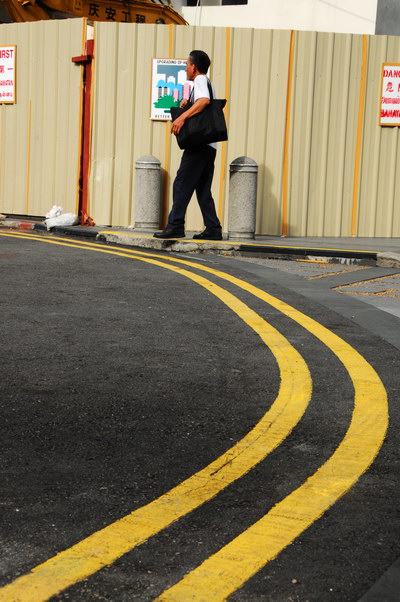 |
| The double yellow lines on the side of the road lead the viewer away to the side of the image. The difference between the two images above is the appearance of a human subject who added life to the image. | |
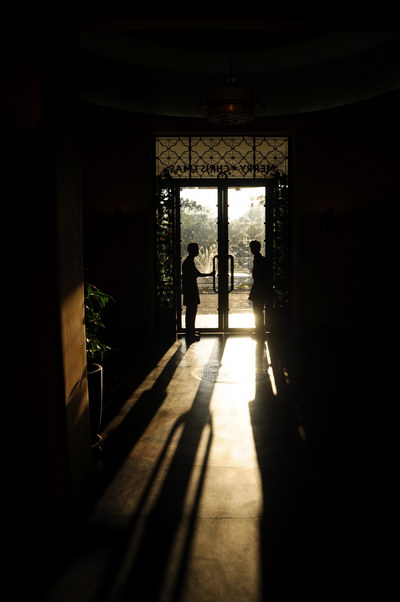
Matrix metering, Daylight White Balance, ISO400, Aperture Priority Mode, Shutter speed 1/1250s, Aperture f3.5, 18-200mm
The dramatic shadow in the early morning created a perspective which showed the distance and depth of the long corridor towards the door. The main subjects are the 2 bellboys at the door. Long shadow can be used to create perspective in an image. Look out for long shadows in the early morning and late afternoon, or with artificial light source.
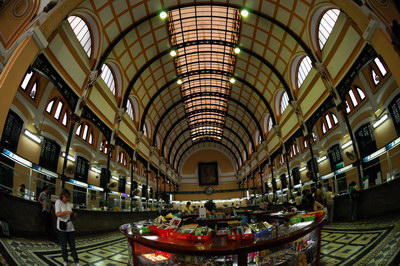
Centre weighted metering, Daylight White Balance, ISO500, Aperture Priority Mode, Shutter speed 1/50s, Aperture f5, 10.5mm fisheye
The big post office in Vietnam has interesting old colonial architecture. The arched supporting frames on the ceiling created the perspective that showed the length of the building’s interior. The distortion created by the fisheye lens exaggerated the effect further.
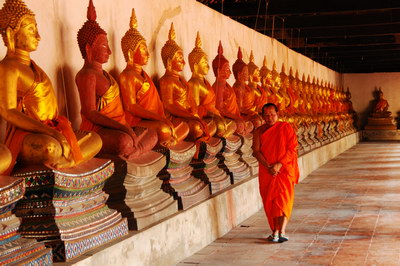
Centre weighted metering, Daylight White Balance, ISO500, Program Mode, Shutter speed 1/50s, Aperture f4.8, 18-200mm, EV minus 0.3
The row of the Buddha images created a sense of distance and depth. A monk walking along the corridor completes the story content. Exposure Value (EV) was set at minus 0.3 to slightly underexpose the image to saturate the colours and at the same time increase the shutter speed to minimize camera shake with an attempt the freeze the movement of the monk.
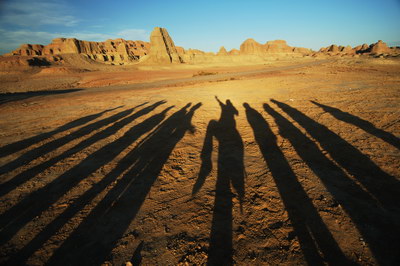
Matrix metering, Daylight White Balance, ISO100, Aperture Priority Mode, Shutter speed 1/320s, Aperture f4, 12-24mm, EV minus 0.7
Once again, the long shadow in the late afternoon created a perspective that revealed the distance and depth. This was sort of a group photograph of a group of photographers. I had to change my standing stance to make my shadow distinctive. Exposure Value (EV) was set at minus 0.7 to provide more saturation to the colours.
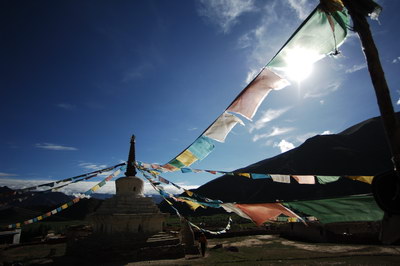
Centre Weighted metering, Daylight White Balance, ISO200, Aperture Priority Mode, Shutter speed 1/8000s, Aperture f2.8, 14mm f2.8
Shot at a high altitude of more than 3800 meters above the sea level, I was struggling to catch my breath in the oxygen deficient environment in highland Tibet. The prayer flags were suspended in midair and the long strings that held the flags lead you towards the stupa. I purposely hid the sun behind one of the colourful flags. The 14mm f2.8 lens was used. This is one of my favourite wide angle lenses.
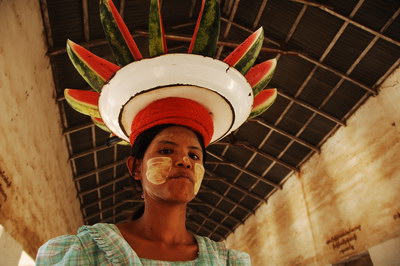
Centre Weighted metering, Daylight White Balance, ISO200, Aperture Priority Mode, Shutter speed 1/125s, Aperture f4, 18-200mm
Shot from a low angle, the beams in the ceiling created a perspective that showed the distance and depth of the long walkway. The main subject was the portrait of the fruit seller in Myanmar whose face was adorned with a natural moisturizer called “tanaka”.
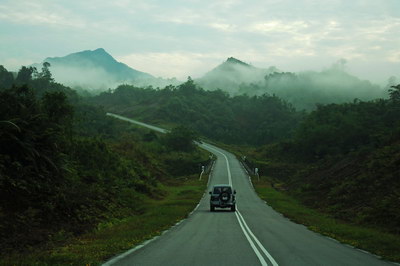
Centre Weighted metering, Daylight White Balance, ISO400, Aperture Priority Mode, Shutter speed 1/2000s, Aperture f4.2, 18-200mm
A very early morning ride in the country road in the suburbs of Kuching, Sarawak, enabled me to capture the early mist. The long road that curved away created the perspective that showed the long distance. I asked my friend to overtake our vehicle so that I could use his vehicle as my subject.
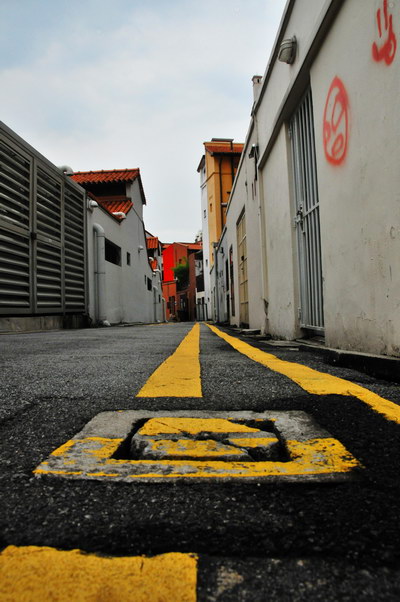
Matrix metering, Daylight White Balance, ISO800, Program Mode, Shutter speed 1/640s, Aperture f13, 18-200mm
Shot from a very low angle with my camera almost touching the ground, I used the Live View to help me with the composition. The Live View is very useful for such situation, without which, I would have to prone on the road which was not very clean in the first place. The yellow lines created a perspective that leads you away to the far end of the road.
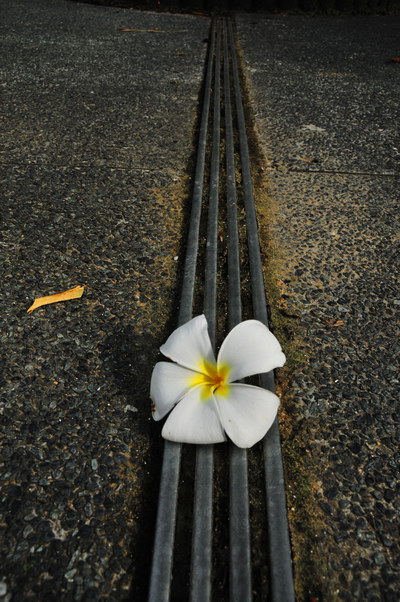
Matrix metering, Daylight White Balance, ISO500, Program Mode, Shutter speed 1/400s, Aperture f10, 18-200mm
The flower was used as a main subject. It contrasted well against the surrounding. The lines created a sense of distance and depth. The image was shot from a low angle.
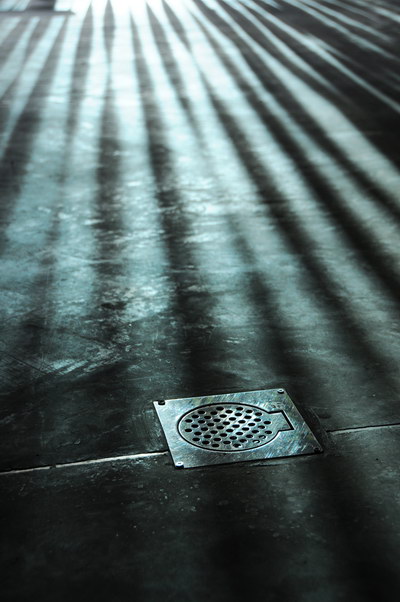
Centre Weighted metering, Daylight White Balance, ISO400, Program Mode, Shutter speed 1/100s, Aperture f5, 18-200mm
The early morning sun created these long shadows which created the perspective. I contemplated for a while and looked for some object that could become the main subject. There was this silver drainage outlet and it blended quite well with the cemented floor. I used it as the main subject.
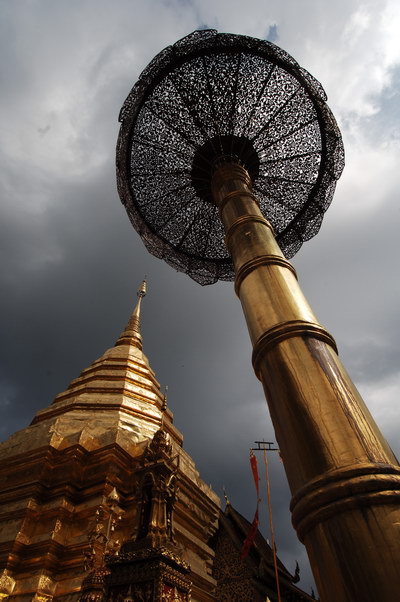
Centre Weighted metering, Daylight White Balance, ISO160, Aperture Priority Mode, Shutter speed 1/640s, Aperture f11, 12-24mm
Using a very low angle shooting upwards created this deceiving illusion where the umbrella appeared being higher than the stupa. The long pole that held the umbrella leads you towards the sky.

Centre Weighted metering, Daylight White Balance, ISO640, Aperture Priority Mode, Shutter speed 1/60s, Aperture f4, 12-24mm
Early morning sunrise image of the Barelang Bridge in Batam, Indonesia. I took the centre of the image as my line of symmetry. The suspension cables created a sense of distance and depth.
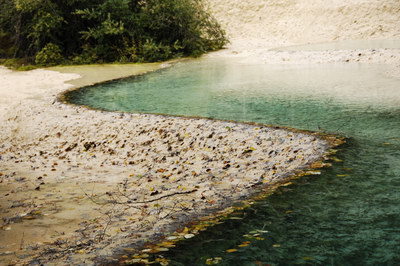
Matrix metering, Daylight White Balance, ISO200, Aperture Priority Mode, Shutter speed 1/200s, Aperture f5, 18-200mm
The S-line leads you to the far end of this natural form in Jiuzhaigou, China. Some common lines which you can take note in creating perspective include the S-line, C-line, multiple curves and their flipped versions.
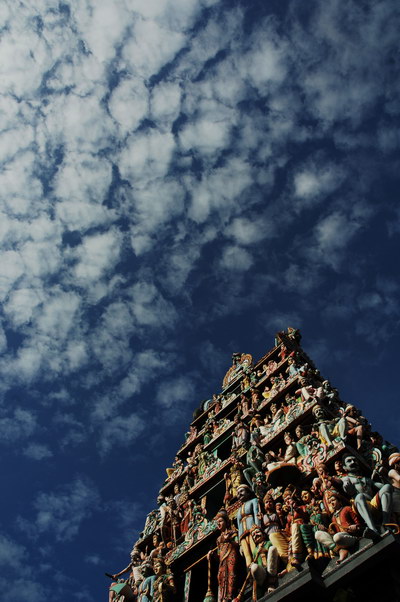
Centre Weighted metering, Daylight White Balance, ISO200, Program Mode, Shutter speed 1/400s, Aperture f10, 18-200mm
The temple tower extends towards the sky which was filled with clouds that looked like cotton wool. When we had the chance to see such nice clouds, do look out for some buildings that can be used as the main subject.
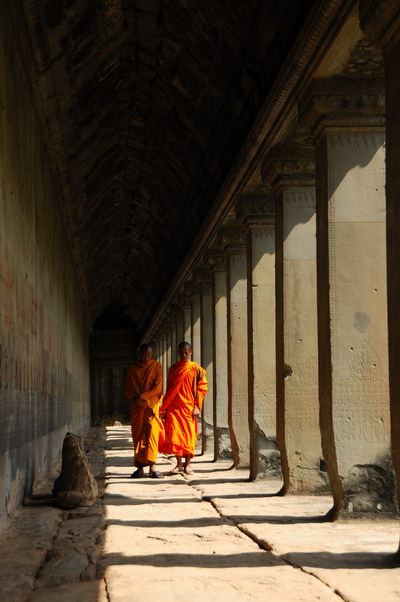
Matrix metering, Daylight White Balance, ISO250, Aperture Priority Mode, Shutter speed 1/800s, Aperture f5, 18-200mm
The row of pillars created the perspective that we need to show the length of the corridor. Two monks in the orange robes contrast well with the surrounding.
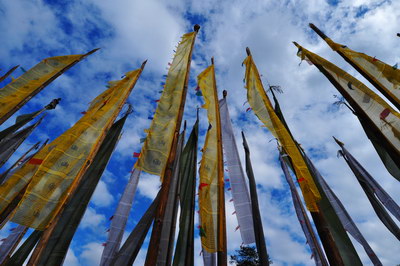
Centre Weighted metering, Daylight White Balance, ISO500, Program Mode, Shutter speed 1/800s, Aperture f14, 12-24mm
A low angle shot upwards showed the long poles that held the prayer flags leading you to the sky. A wide angle lens was used.

Centre Weighted metering, Daylight White Balance, ISO1000, Program Mode, Shutter speed 1/1000s, Aperture f16, 12-24mm
The fog created the desired mood which I wanted for the forest. I shot upwards with a wide angle lens to create the perspective of the tree trunks leading you skywards. The digital enhancement software was used to create the sunset colour. An alternative method was to use a sunset filter but I preferred to have different choices for the colour of the sky with the software.
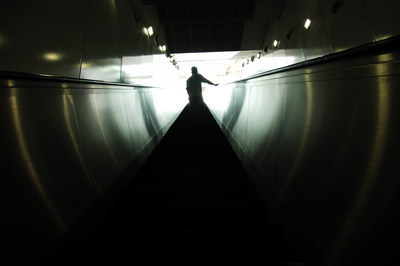
Matrix metering, Daylight White Balance, ISO320, Program Mode, Shutter speed 1/90s, Aperture f4.8, 18-200mm
A low angle shot of the escalator moving towards the exit. The silhouette of the person served as the main subject.
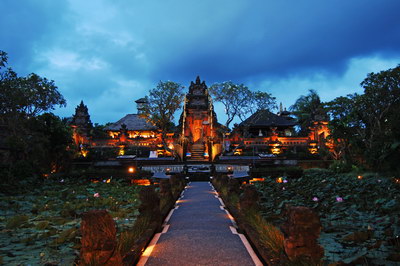
Matrix metering, Daylight White Balance, ISO100, Aperture Priority Mode, Shutter speed 2.2s, Aperture f4, 12-24mm
The Lotus Café in Bali, Indonesia, looks great in the evening with the lights on. The long walkway towards the main structure created a sense of distance and depth.


