Technology changes with time, but the fundamentals and recipes in photography remains. This article was first published in 2006, revised in 2018
Portraiture photography had come a long way dating back to the days when photography first started in the mid of the 19th century. Defined by some as the ability to capture the likeness of a person or a group of people, it is an inexpensive way to get the portrait done in the early days of photography as compared to commissioning an artist to paint. As time goes by, portraiture photography goes beyond just capturing the likeness; it also captures the person’s mood at that moment in time.
So much on the very brief history of portraiture photography. Conventional articles on portraiture photography often dwell on the various lighting and posing techniques. Lighting fundamentals include Rembrandt lighting, butterfly lighting, side lighting, backlighting, etc. One can easily retrieve such articles from the internet. In this article, I approach a different angle where I shall focus more on the common problems and tips of getting some portraiture shots.
Photographers take portraits for different reasons. Some photographers shoot candid portrait shots of their loved ones especially shots of their children; some like to shoot posed shots of models while some capture the fleeting candid moments of the people on the street. Regardless of the intention, common problems faced by the photographers include:
- Camera or subject shake
- Messy background
- Unsure of which angle to adopt
- Exposure on the face
- Very dark background for night portrait with flash
Poor lighting condition which results in slow shutter speed is the main culprit for camera and subject shake. If the subject is stationary, a good tripod will be useful in preventing camera shake. However, if the subject is moving, it is important to use a higher ISO and a bigger aperture to ensure that you will have a faster shutter speed to minimize camera shake and at the same time, freeze the motion of the subject.
Many photographers often overlook the distracting objects in the background which can make the background look unpleasantly messy. This can be a lamp post, a long pipe, a tree which will make the portrait shot a disaster especially if the lamp post appears to “grow” on the subject’s head. One quick way to solve this problem is either to move yourself or you move the subject to another place without much background clutter.
Another common problem faced by photographers is the lack of ideas as to what angle and composition to use to shoot the portrait. Whether to shoot whole body, half body, and whether to zoom in to tighten the angle or a wider angle to include more things, these often leave photographers with so many options to choose from. One approach is to spend some time exploring the various angles. No harm trying to experiment with the various angles and shoot more. If the results are unsatisfactory, you can always delete the images later.
When we are photographing people against a brighter background, we would often see the face or the body being under exposed. This is due to the contrast in exposure. This can be rectified by using the Shadow/Hightlight feature in Photoshop or the Light EQ in ACDSee. You may like to switch on the light optimiser or Active D-Light in the camera setting but I would say that adjusting the shadow brightness is better done on the computer.
As for shooting portraits with flashlight at night, the most common problem is having the subject lit up with flash but the background is too dark. There is no way the flashlight can lit up that building in the background which is easily 50 meters away and beyond the reach of the flash. The quick way to solve this problem is to activate the Night Portrait Vari-Program mode or the Slow Sync flash. However, activating either one of these modes will result in slow shutter speed. Hence, it is important that a tripod is available and ask your subject not to move.
Lastly, the eyes are the windows to the soul. You like to have the eyes of the subject as sharp as possible. If the face is facing you directly, both eyes should be technically sharp. However, if the face of the portrait is at an angle to you, you may end up having one eye sharp and another eye blur due to the depth of field. You may consider setting to Aperture Priority mode, set the aperture to f11 and it should solve the depth of field issue. But do take note of the Shutter Speed which should get a bit slower due to the smaller Aperture and you should decide whether there is a need to use a higher ISO to compensate.
Some Tips:
- Try various angles (top, low, eye level).
- Any lens can shoot portrait (how about a fisheye lens?).
- Avoid clutter in the background. Keep it simple.
- Use of lighting to create visual impact.
- Play with depth of field with aperture priority mode.
- Candid moment.
- Communicating with the subject.
- Night portrait flash or slow sync for portrait shots at night.
- If need be, increase ISO to minimize camera shake.
- Make sure the eyes are sharp. It tells the story.
- Catch light add life to the face.
With the tips above in mind as well as the case studies below, you should be embarking on your new journey in portraiture photography.
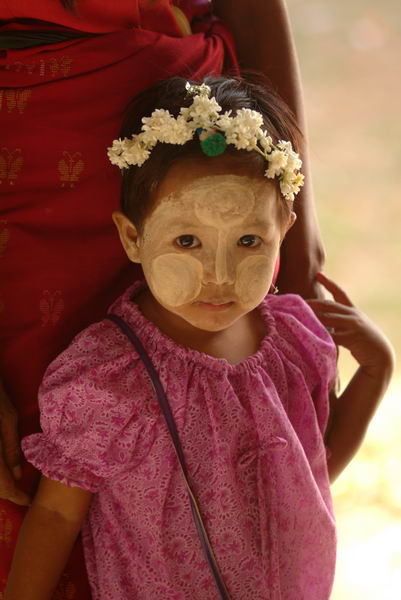
Matrix metering, Daylight White Balance, ISO200, Program Mode, Shutter speed 1/60s, Aperture f3.5
A high angle was used to capture this shot where the girl looked up to me. A reflector was put near this young girl. The catch light on the eyes of the girl due to the reflector added life to the image. The reflector helped to reflect the light onto the girl’s face which is in shadow. An alternative way is to fill in light with the flashlight but the reflected light from the reflector seems more natural.
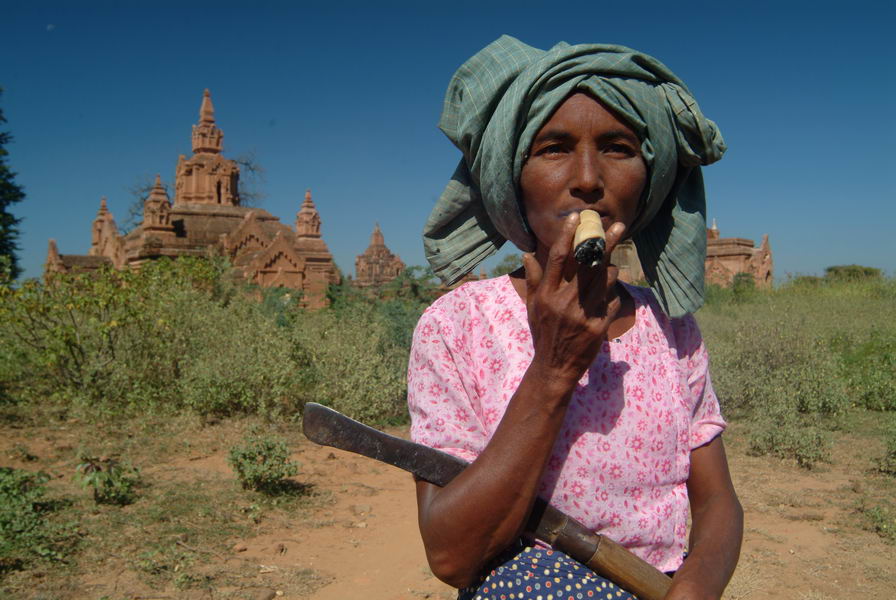
Centre-Weighted metering, Daylight White Balance, ISO100, Program Mode, Shutter speed 1/125s, Aperture f6.7
The 12-24mm lenses was used to capture this shot of the woman with the background. As I could not speak Myanmese, I depended on the local guide to communicate to her and pose for this picture. It is important to get a good guide and translator to get things done in a country where you cannot speak its language. Communication is important.
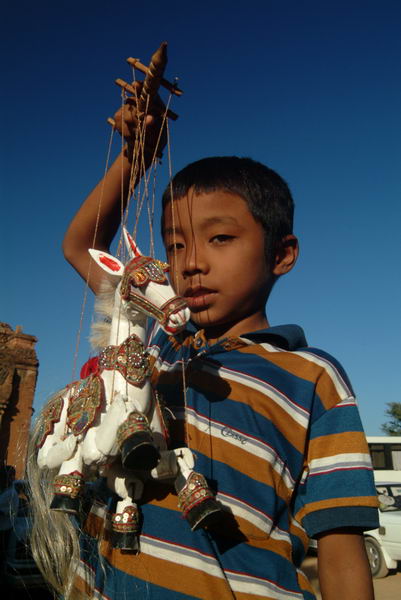
Centre Weighted metering, Daylight White Balance, ISO200, Program Mode, Shutter speed 1/160s, Aperture f3.
Merely shooting a half body portrait of this boy can be boring. I hinted to him to hold his puppet horse up high. He tends to a makeshift shop where he sells the handicrafts. I chose to shoot from a slightly lower angle to avoid the clutter in the background which can be very obvious if I were to shoot from the boy’s eye level. By going lower, my frame saw more sky which is a neater background.
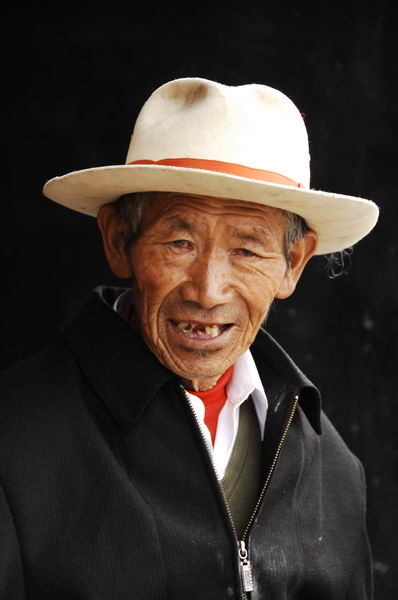
Centre Weighted metering, Daylight White Balance, ISO400, Aperture Priority Mode, Shutter speed 1/160s, Aperture f5
Shot in Tibet, where I cannot speak its language. My local guide was not with me and I had to use hand gestures to hint to this gentleman that I would like to take a portrait of him. Somehow, I manage to move him to a corner where the background is dark and not messy. It is important to smile more so that your subject can feel more at ease with you. My experience also tells me that I have to be careful about choosing my subject. Avoid greedy subjects who will ask for a tidy tip from you, if at all possible.
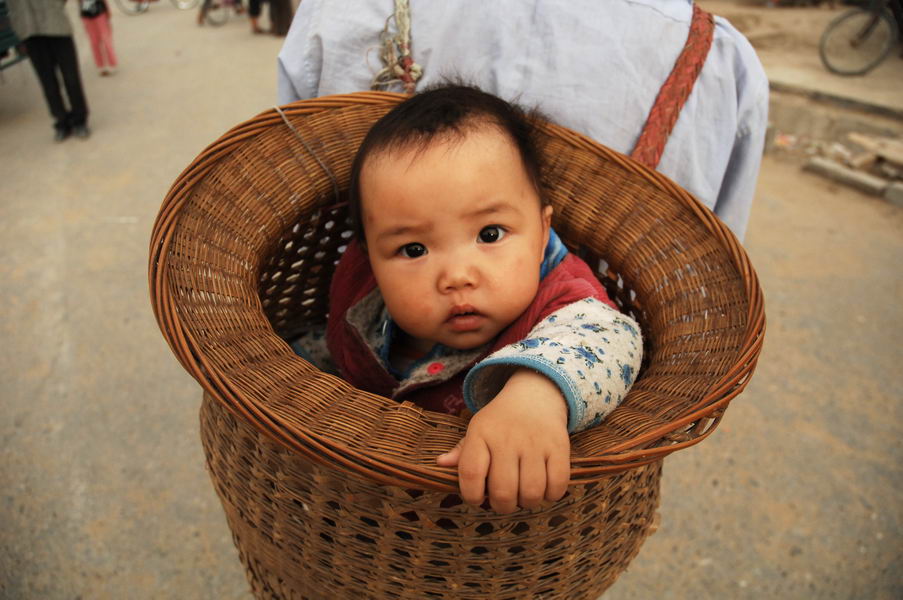
Centre Weighted metering, Daylight White Balance, ISO400, Aperture Priority Mode, Shutter speed 1/1000s, Aperture f4.5
We were exploring the street scenes in a small town in Xinjiang when this father candidly carried the baby in a basket. I followed closely behind and fired away more than 20 shots as I knew that it was the moment not to be missed. To choose 1 shot from 20 is a better probability than having no choice especially if that 1 shot is blurred due to camera and subject shake.
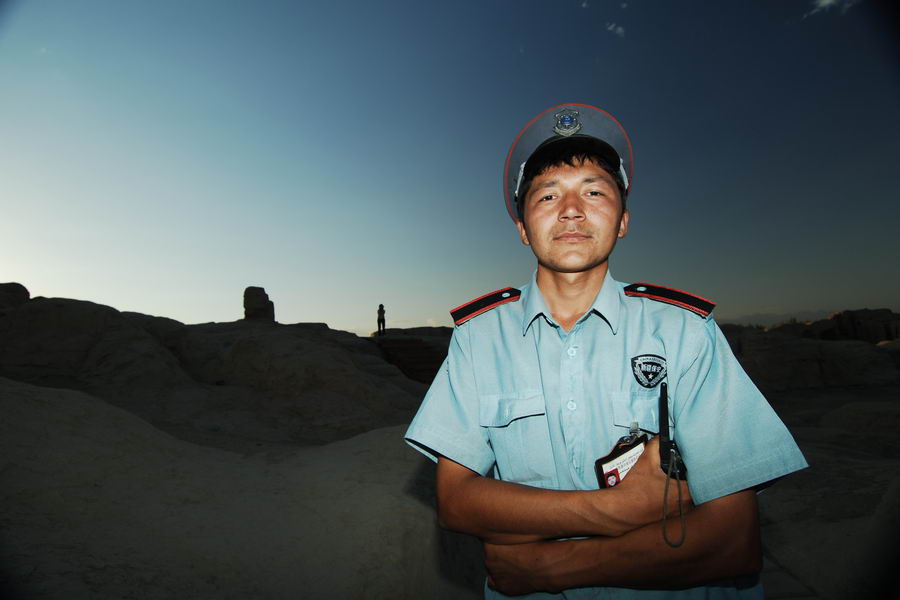
Centre Weighted metering, Daylight White Balance, ISO100, Program Mode, Shutter speed 1/125s, Aperture f5.3
Flashlight was used to fill in light on the subject’s face in this sunset shot. This guy is a security personnel in charge of the security of one of the ancient ruins in Xinjiang. I asked him to stand in a position so that some traces of the ruins can be seen in the background. I could have used the Night Portrait Vari-Program mode or slow sync flash to brighten the background but I preferred the ruins in the background be silhouetted against the setting sun. Either approach is technically fine, just a matter of intention of what you want to achieve.
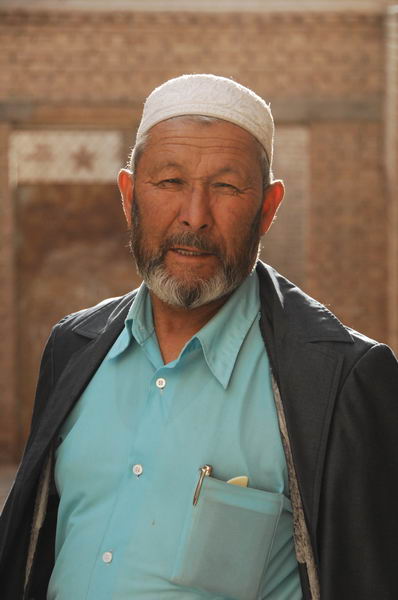
Matrix metering, Daylight White Balance, ISO800, Aperture Priority Mode, Shutter speed 1/500s, Aperture f5.6
It is good to have backlight to light up this subject from the backt. The backlight created the outline of light around the subject’s body. A clean background was chosen while I try to ensure that the backlight effect was still possible at where he stood. Communication is important and I needed the help of my local guide in Xinjiang to talk to the old man.
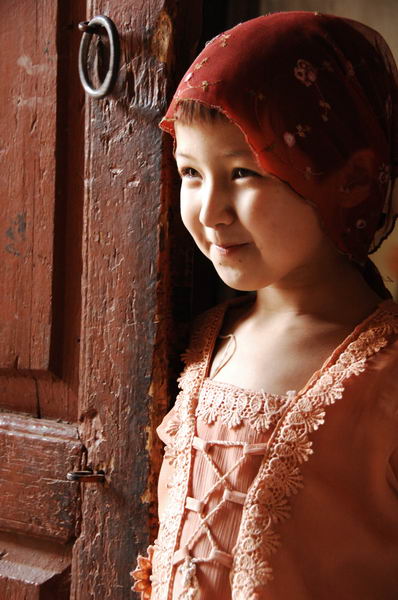
Matrix metering, Daylight White Balance, ISO800, Aperture Priority Mode, Shutter speed 1/10s, Aperture f5.6
An example of Rembrandt lighting which creates the triangular shape of light beneath the girl’s left eye. This lighting technique is very common in portraiture photography. In this case, natural lighting was used. Hence, I had to ask the girl to turn her head until the triangular shape of light was formed beneath her left eye. As the lighting condition is quite poor, I had to use a higher ISO with a bigger aperture and activated the Vibration Reduction feature of the Nikon lenses to minimise camera shake.

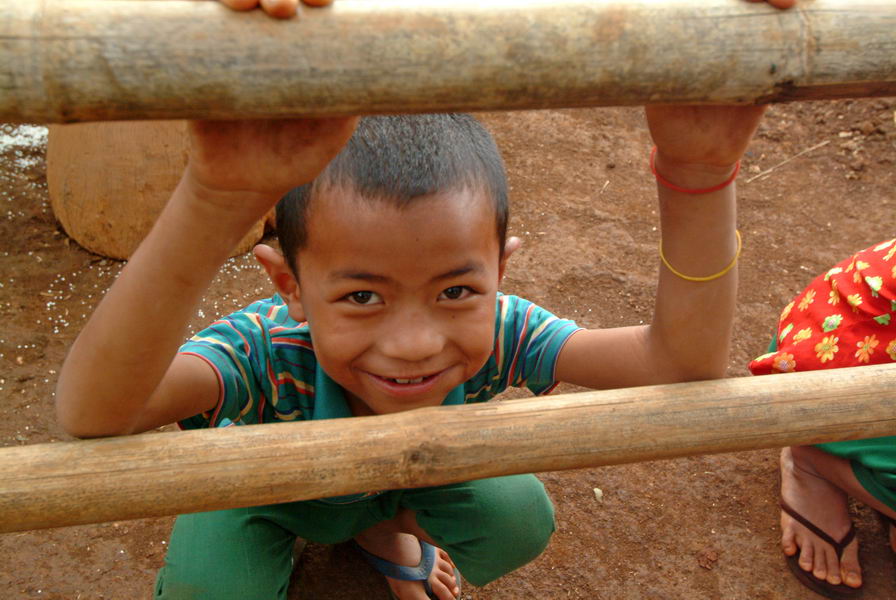
Matrix metering, Daylight White Balance, ISO400, Aperture Priority Mode, Shutter speed 1/180s, Aperture f5.6
Shooting from a top angle made this boy looked up at me. From a top angle, I am able to have a cleaner background free from clutter. If I shot from the eye level of the boy, clutter will appear in the background. I shot more than 15 shots of his different expressions. It does not harm to shoot more and have more choices, rather than no choice.
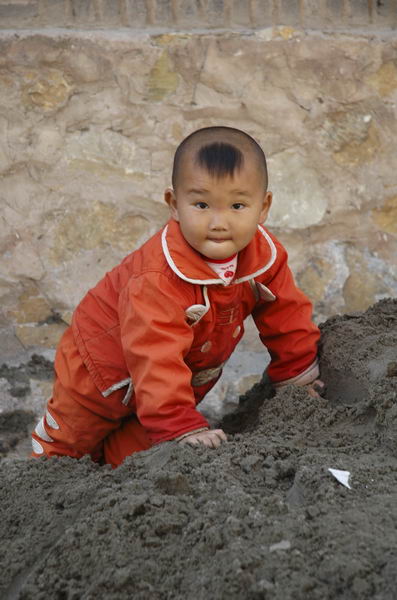
Centre Weighted metering, Daylight White Balance, ISO800, Program Mode, Shutter speed 1/160s, Aperture f6.7
Candid moment of the children often leaves you with great shots as they are most natural and less formal when they are relax. A high ISO was used as the lighting condition was poor and using a tripod was not my immediate option as I could not ask him to hold on to the position while waiting for me to setup my tripod. It is important to make sure that the eyes are focused.
Matrix metering, Daylight White Balance, ISO400, Program Mode, Shutter speed 1/60s, Aperture f3.5
Very interesting hair-do. This candid moment of the boy left me with little time to react in this picture where the lighting condition was poor. I was fortunate to have the ISO set at ISO400 and I fired away several shots out of which one was chosen. I had to draw his attention to me so that he would not move about so much. Some of the shots have camera shake and motion blur. A higher ISO would reduce the chances of camera and subject shake but I took the risk with ISO400 in this low light condition.
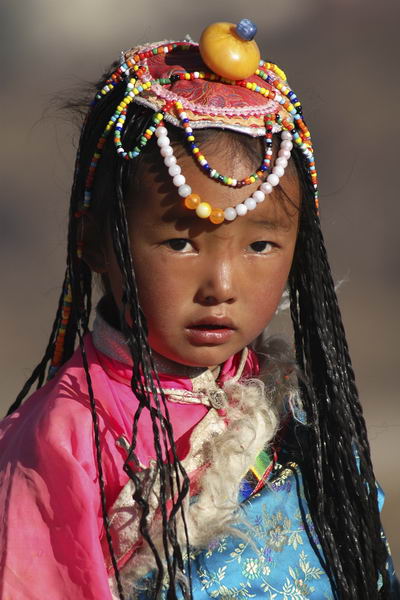
Centre Weighted metering, Daylight White Balance, ISO100, Program Mode, Shutter speed 1/500s, Aperture f3.5
With a bigger aperture, longer lenses and getting closer to the subject, the smaller depth of field enables the background to be blurred. This will avoid clutter in the background. As it was a sunny morning, a low ISO was sufficient to get a fast enough shutter speed. This shot of the Tibetan girl was taken in Shangrila, China. She was actually supposed to pose with tourists to take photographs for a living. We requested to take photograph of her instead. A tip here is if you want to take pictures of the people in traditional costume, look out for such photography outlets where the locals dressed up nicely to take pictures with tourists. You do not have the time to wait for the next festival as you do not live there, unless you happen to visit the place when they are celebrating the festival!
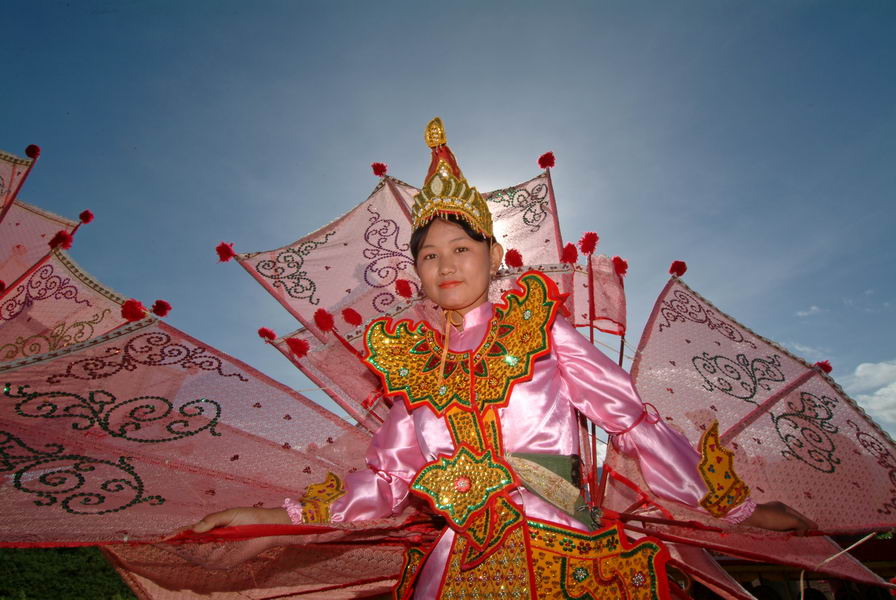
Matrix metering, Daylight White Balance, ISO100, Program Mode, Shutter speed 1/125s, Aperture f19
Shot from a low angle so that the background consists of the sky, a fill-in flashlight was needed to brighten the face of the dancer. A wide angle lenses was used so that I could capture more of the dancer’s props. I hid the sun behind the dancer’s head to create a halo of light around her head. I had to lie on the grass to get this shot done from a low angle. A hint here is to watch the ground before you lie down. The last thing you wanted to experience is to lie down on something moist and smelly. While it is good to be adventurous with the angles, do not dirty yourself and feel uncomfortable especially if you still have the whole day to shoot! I always have a spare shirt in my bag when I travel.
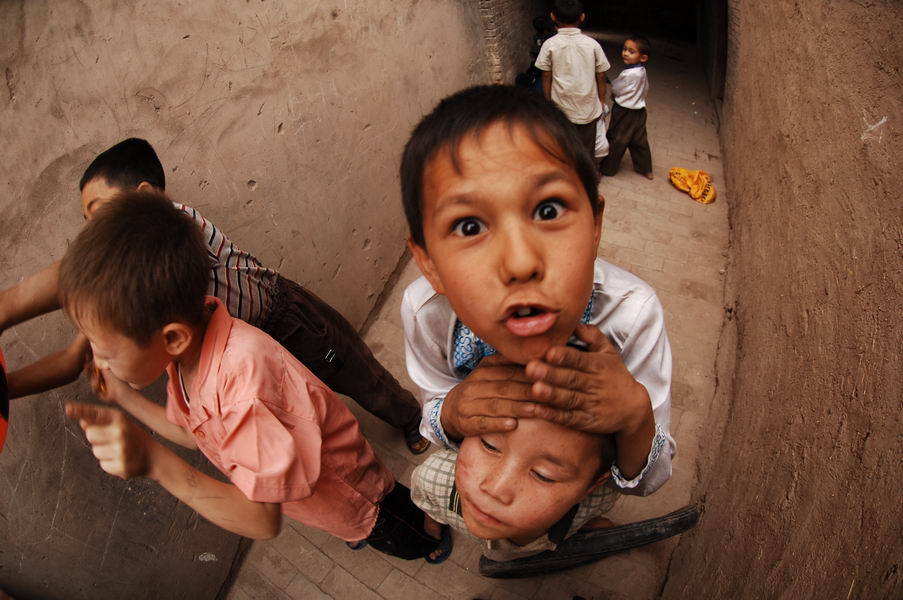
Centre Weighted metering, Daylight White Balance, ISO160, Program Mode, Shutter speed 1/60s, Aperture f4
It can be interesting to make use of the fisheye lenses to play with the distortion when you shoot portraits. The fisheye lenses allow me to go close to the subjects and yet the angle of coverage is awesome. It enabled me to show the main subject in the environment where he plays everyday. With a fisheye lenses, the chances of camera shake is also reduced tremendously since the minimum shutter speed to minimise camera shake is 1/focal length.

Matrix metering, Daylight White Balance, ISO100, Program Mode, Shutter speed 1/250s, Aperture f3.5
Shot from a low angle with a wide angle lenses, the background are the branches which are spreading outwards instead of some messy clutter of various subjects if I were to shoot from my eye level. A low ISO was needed as the lighting was strong. To make the boy more candid and relaxed, I asked him to put the lollipop in his mouth. It is good to prepare some sweets and candies or lollipops in your bag which you can distribute to the children.
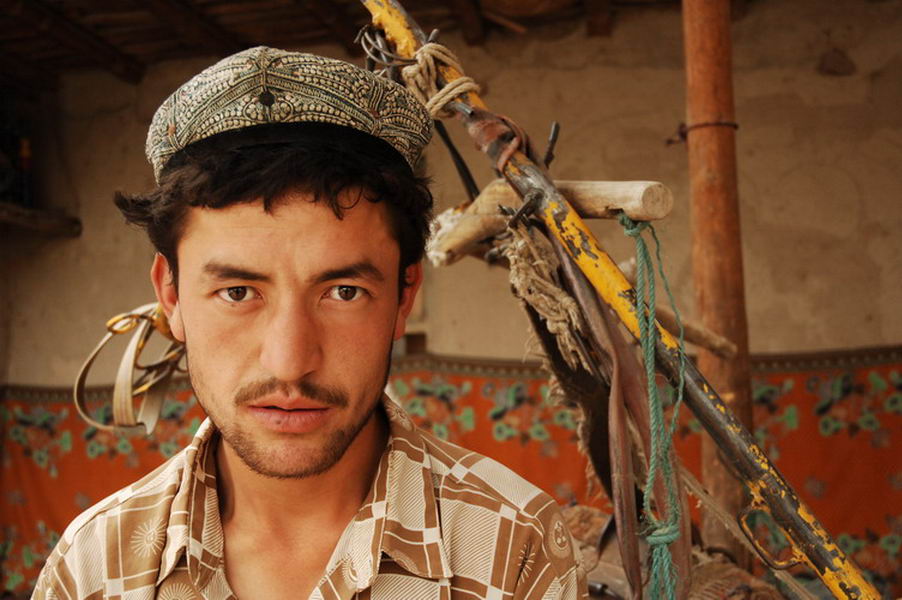
Centre Weighted metering, Daylight White Balance, ISO400, Program Mode, Shutter speed 1/125s, Aperture f4.5
This is a classic case study of a shot with clutter in the background. The subject’s right ear seemed to have something sticking out. The long rusty yellow pole was also very distracting. Clutters are things to avoid. This shot can be made better by asking your subject to stand in a place where the background is quite clean from clutter or you can reposition yourself.
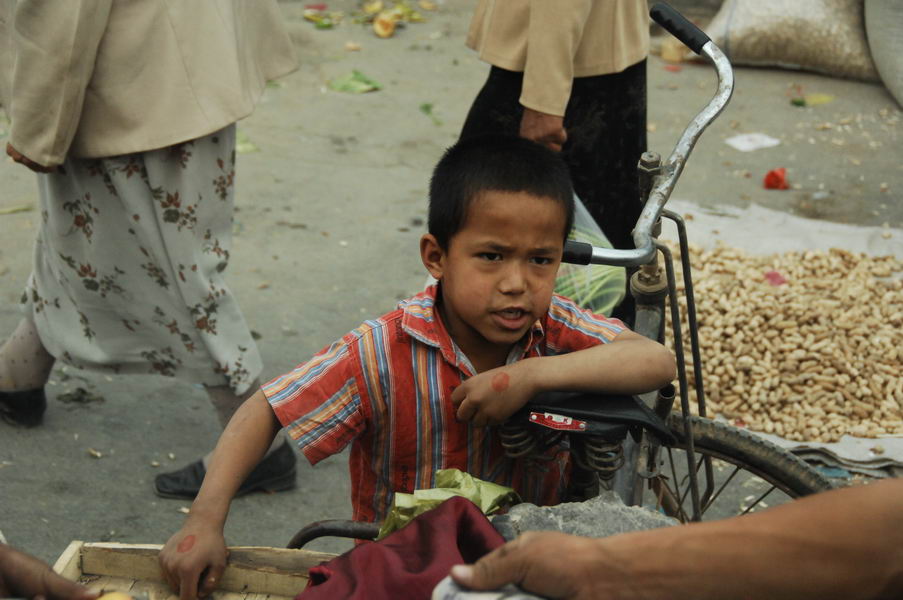
Matrix metering, Daylight White Balance, ISO800, Aperture Priority Mode, Shutter speed 1/500s, Aperture f5
If you notice the handle of the bicycle, it seemed to “cut” into the head of the subject. The arm in the bottom right corner of the picture adds to the clutter. Also, the hand of the person behind the boy seems to “punch” into the boy’s head. This is another example of unnecessary clutter which you can train yourself to avoid when you take pictures of people.


